Before You Begin
Purpose
This tutorial shows you how to create a basic travel request application from scratch in Oracle Process Cloud Service Composer.
Time to Complete
Approximately 1.5 hours
Background
Oracle Process Cloud Service is a cloud-based software development Platform as a Service (PaaS) that provides a hosted environment for your process applications. Oracle Process Cloud Service has two main environments: In Workspace, end users perform process tasks, and administrators monitor process performance. In Composer, developers create, test, and manage the life cycle of applications. Applications developed in Composer are deployed to and used in Workspace.
Applications can be created from scratch or from a
QuickStart App. The applications that you create
from scratch in Composer can consist of one or more
of the following application components:
- Processes are a sequence of tasks or activities that result in a well-defined outcome. Business Process Model and Notation (BPMN) elements within the process define the flow and behavior of the application.
- Web Forms define the interface that your application users see in Workspace. You can create web forms from the ground up or you can base them on an existing data structure.
- Business Types represent real-world concepts or objects, such as a ticket, a request, or an employee. You use business types to create the data structures that are required in your application.
- Decisions are containers for if/then rules and decision tables that use the same input and output data objects. A decision exposes these data objects as a reusable service that multiple business processes can invoke.
- Connectors define how a business process connects to other processes, systems, and REST and web services services.
- Documents are organized and stored in Oracle Documents Cloud Service and used in Oracle Process Cloud Service.
- Indicators are designated data objects used to capture business metrics for your process.
QuickStart Apps are ready-to-use applications with all the implementation details included for you to play, test, and deploy the application.
In this tutorial, you create a basic travel request application from scratch that uses a business process, web form, and indicator components. You then play, test, and deploy the application.
What Do You Need?
Creating an Application
In this section, you create a travel request application in a new space called HR and then assign two users to the HR space. Spaces group related applications and enable users to collaborate when developing applications.
For a preview of what you'll do, watch "Creating an Application and Using Spaces for Collaborative Development."
-
On the Composer home page, click New Application.
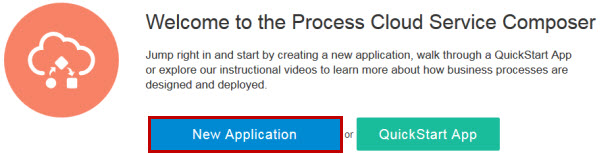
Description of this image -
In the Create Application dialog box, enter or select the following values, deselect Open Immediately, and click Create.
- Name:
Travel Request Application - Description:
Application for users to request business travel - Space: New Space
- Space Name:
HR
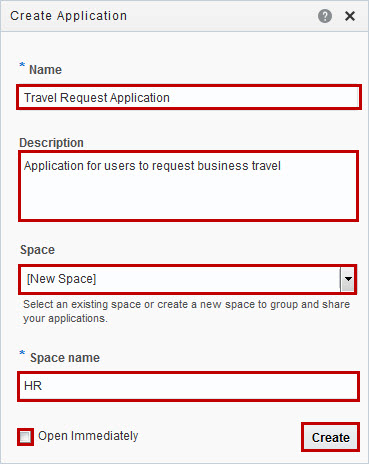
Description of this image - Name:
-
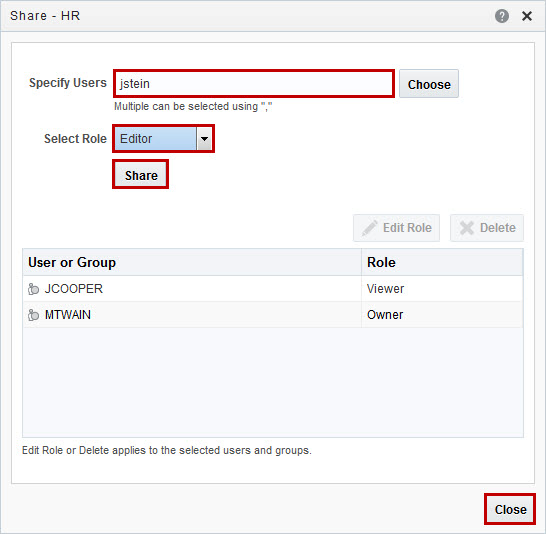
In the Filter and Spaces pane, click HR, and then click Share.
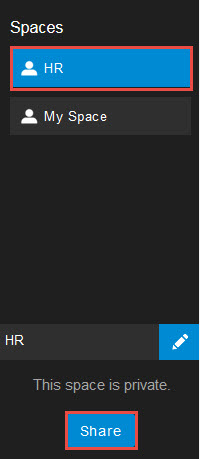
Description of this image -
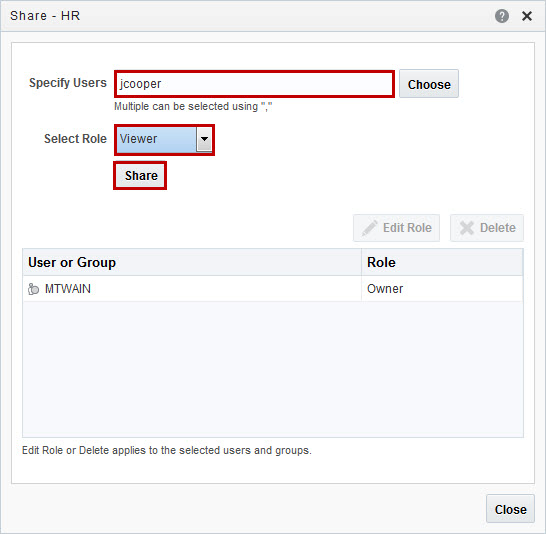
In the Share - HR dialog box, enter a user name, select the Viewer role, and click Share. This user can view your Travel Request Application but can't make any changes.
If you don't know valid user names, contact your Identity Domain Administrator.
Description of this image -
Repeat step 4 to add a second user with the Editor role, and click Close. This user can help you design the Travel Request Application.
Description of this image
Adding a Business Process
In this section, you use a pattern template to create and design a business process for the Travel Request Application.
For a preview of what you'll do, watch "Creating and Configuring a Business Process."
Creating a Business Process
-
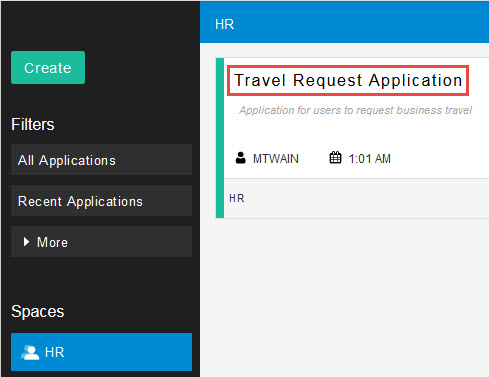
On the HR spaces page, click Travel Request Application.
Description of this image -
On the application toolbar, click Edit.

-
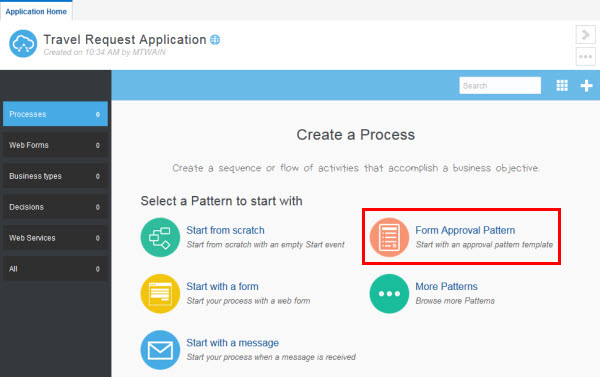
On the Travel Request Application home page, click Form Approval Pattern.
Description of this image -
In the Create Process dialog box, enter
Travel Request
                                      Process
for the name, enterBusiness process for the Travel Request Applicationfor the description, and click Create.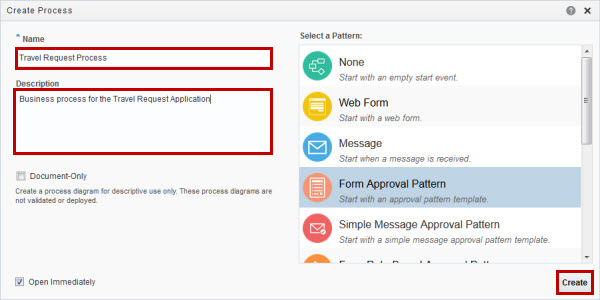
Description of this image -
Click the X to close the help overlay, if it opened.

Description of this image
Adding Roles and Swimlanes to the Travel Request Process
-
In the Travel Request Process, double-click Process Owner, enter
Employeein the Role field, and press Enter.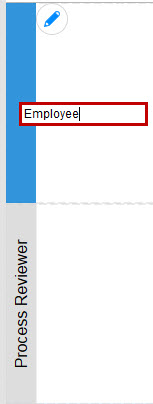
Description of this image -
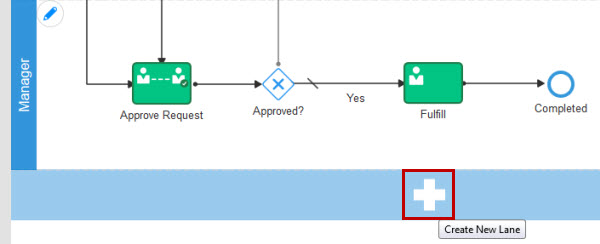
Double-click Process Reviewer, enter
Managerin the Role field, and press Enter. -
Below the Manager swimlane, click the Plus icon to add a new lane.
Description of this image -
Double-click Process Owner, enter
Supervisorin the Role field, and press Enter.
Designing the Travel Request Process
-
In the Travel Request Process, ensure that you're in Edit mode.

Description of this image -
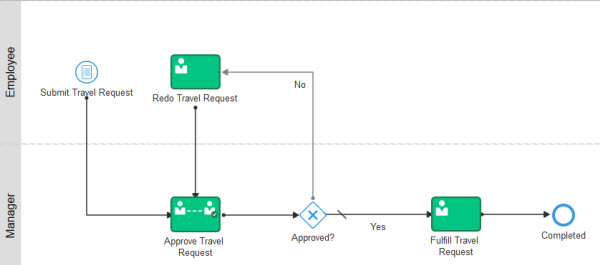
Double-click the Submit Request name, and rename it
Submit Travel
                                      Request.
Repeat these actions to rename the following elements:- Resubmit:
Redo Travel Request - Approve Request:
Approve Travel Request - Fulfill:
Fulfill Travel Request
Description of this image - Resubmit:
-
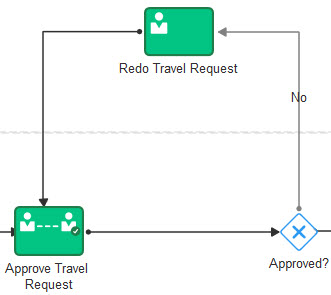
Drag and drop Redo Travel Request to the right about an inch.
Description of this image -
In the Elements Palette, click Gateways.
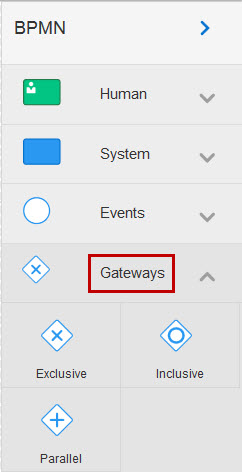
Description of this image -
Drag and drop Exclusive Gateway to the sequence flow in the Manager swimlane between Submit Travel Request and Approve Travel Request, and rename it
Amount
                                      > 5000.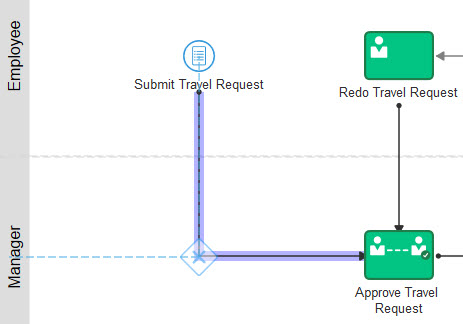
Description of this image -
In the Elements Palette, click Human, drag and drop the Approve human task to the Supervisor swimlane, and rename it
Review by Supervisor.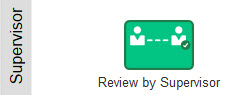
Description of this image -
In the Elements Palette, drag and drop Exclusive Gateway to the right of Review by Supervisor in the Supervisor swimlane, and rename it
Supervisor
                                      Approved?
.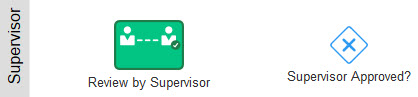
Description of this image -
Click Amount > 5000 gateway, click Add Sequence Flow, and drag the sequence flow to Review by Supervisor.
Description of this image -
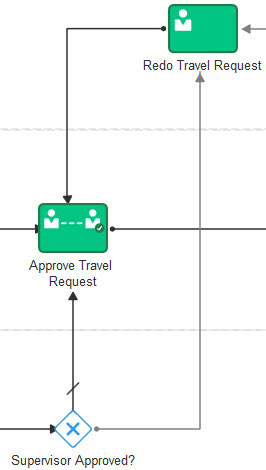
Repeat step 8 to add the following sequence flows between the specified elements:
- Review by Supervisor to Supervisor Approved?
- Supervisor Approved? to Approve Travel Request
- Supervisor Approved? to Redo Travel Request
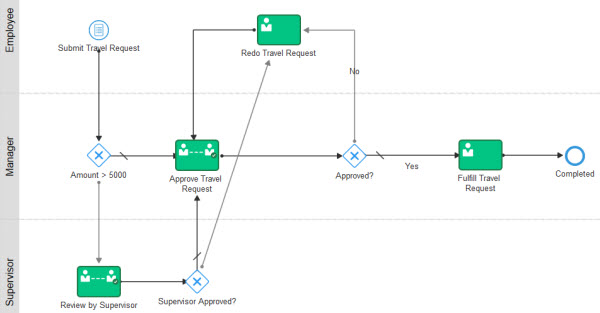
Description of this image -
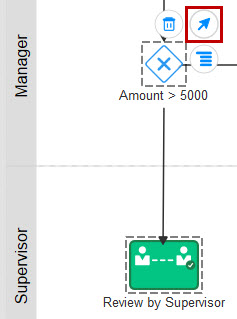
Drag the sequence flow between Supervisor Approved? and Redo Travel Request to the right side of the Supervisor Approved? element.
Description of this image -
Double-click the sequence flow between Amount > 5000 and Approve Travel Request, and enter
Nofor the name.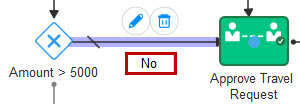
Description of this image -
Repeat step 11 to add the following names to the specified sequence flows:
- Amount > 5000 to Review
by Supervisor:
Yes - Supervisor Approved ?
to Approve Travel Request:
Yes - Supervisor Approved ?
to Redo Travel Request:
No

Description of this image - Amount > 5000 to Review
by Supervisor:
-
On the application toolbar, click Save, and then click Publish to make the application available to other participants.

Description of this image -
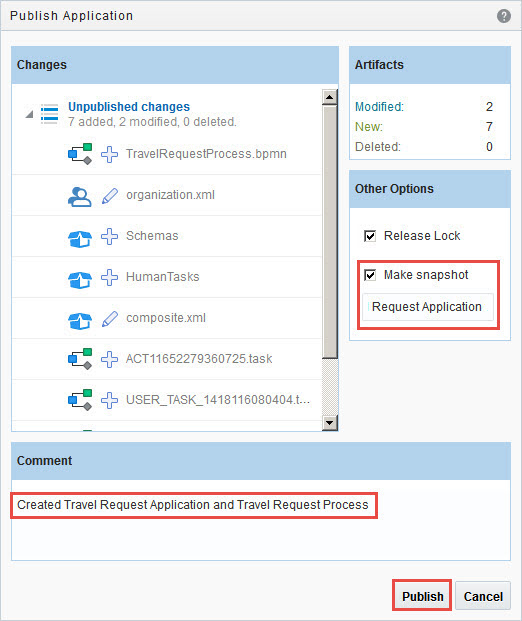
In the Publish Application dialog box, select Make snapshot, enter
Initial Travel Request
                                      Application
for the snapshot name, enterCreated Travel Request Application and Travel Request Processfor the comment, and click Publish.When you make a snapshot, a copy of the application is created at its current state, and you can revert to later.
Description of this image
Specifying the Implementation for the Travel Request Process
In this section, you specify the implementation details for the Travel Request Process. You create a web form with web form rules, define and associate data, use expressions for sequence flows, and add business indicators.
Creating and Designing a Web Form
For a preview of what you'll do, watch "Designing a Web Form."
-
On the application toolbar, click Edit.
-
In the Travel Request Process, click Submit Travel Request, click Menu, and select Open Properties.
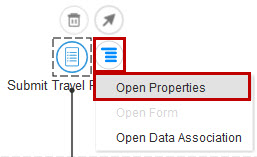 Re
Re
Description of this image -
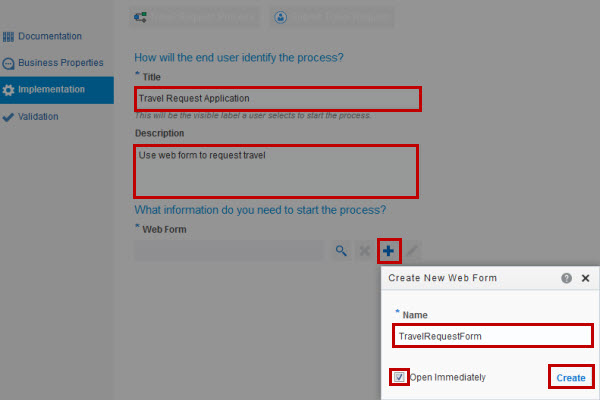
In the Implementation pane, enter
Travel Request
                                      Application
for the title andUse web form to request travelfor the description. Click Create New Web Form, enterTravelRequestFormfor the name, select Open Immediately, and click Create.The title becomes the application name that your users see in Workspace.
Description of this image -
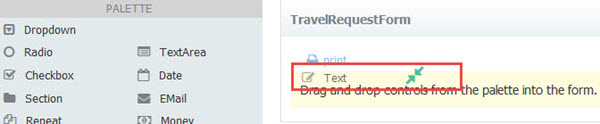
In the Web Form Designer, drag and drop the Text control from the Palette to the body of the form.
Description of this image -
Click the control name, enter
Name, and then click in the body of the web form.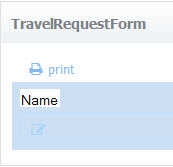
Description of this image -
Drag and drop the following controls to the main body of the web form and rename the controls as specified:
- Phone:
Phone - Email:
EMail - Money:
Travel Amount - Tabs: Rename Tab 0
Trip
                                        Details
, rename Tab 1Expenses, click Tab 2, and click the Delete (-) icon to remove this tab.
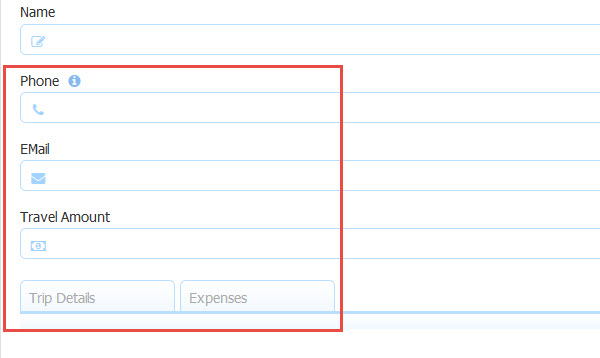
Description of this image - Phone:
-
Drag and drop the following controls to the Trip Details tab and rename the controls as specified:
- Date:
Travel Date - Dropdown:
Country - Dropdown:
City - Radio:
Purpose of Travel - Text:
Customer Name - TextArea:
Other Details
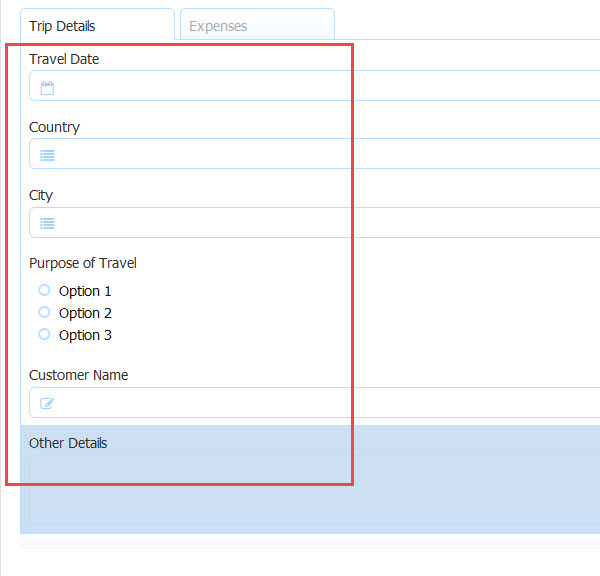
Description of this image - Date:
-
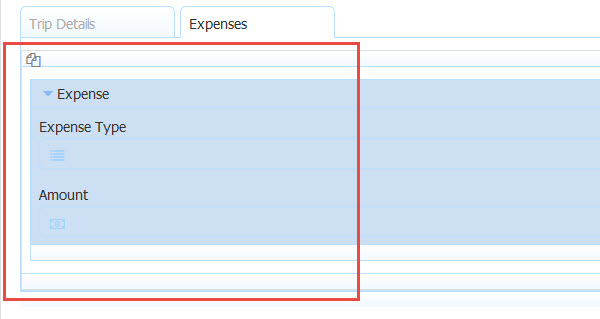
Drag and drop the Repeat control to the Expenses tab. Drop the Section control below the Repeat control and enter
Expensefor its name.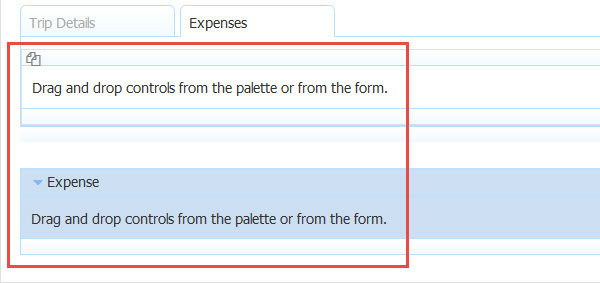
Description of this image -
Drag and drop the following controls to the Expense section and rename the controls as specified. Then drag the Expense section into the Repeat control.
- Dropdown:
Expense Type - Money:
Amount
Description of this image - Dropdown:
-
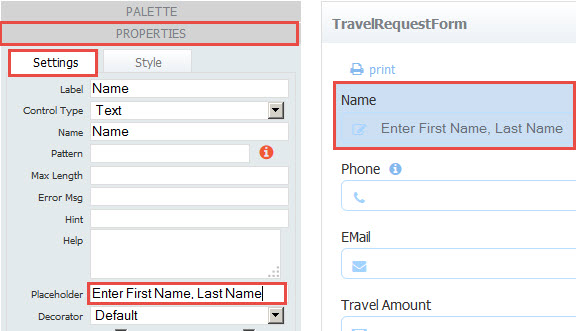
Select the Name control, and expand the Properties editor. On the Settings tab, enter
Enter First Name, Last Namefor Placeholder, and leave the other fields as is.The text entered in the Placeholder field is displayed when the user views the web form in Workspace.
Description of this image -
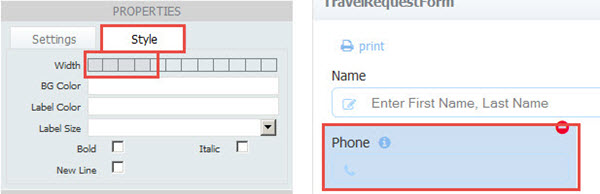
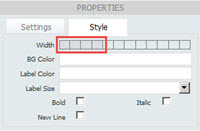
Select the Phone control, click Style, set the Width to 4 grid columns, and leave the other fields as is.
Because phone numbers have a specific length, reducing the field width makes better use of the web form space.
Description of this image -
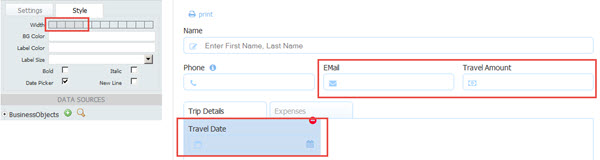
On the Style tab, set the Width to 4 grid columns for the following controls. Leave the other fields as is.
- Travel Amount
- Travel Date
Description of this image -
Edit the Settings and Style properties for the following controls:
Control
Settings Tab
Style Tab
Image Country Options:
USA=USA
Delete Option2=Option2 and Option3=Option3
Leave the other fields as is.
You can also use web form rules to invoke a web service to populate options for drop down lists.Width:
Set to 4 grid columns.
Leave the other fields as is.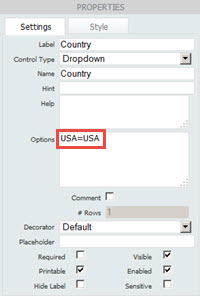
Description of this image
Description of this image City Options:
Los Angeles=Los Angeles
New York=New York
San Francisco=San Francisco
Leave the other fields as is.Width:
Set to 4 grid columns.
Leave the other fields as is.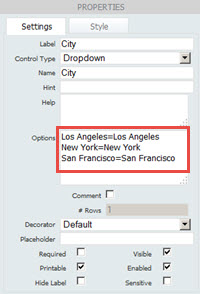
Description of this image
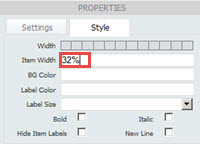
Description of this image Purpose of Travel Options:
Customer Visit=Customer Visit
Conference=Conference
Training=Training
Leave the other fields as is.Item Width: 32%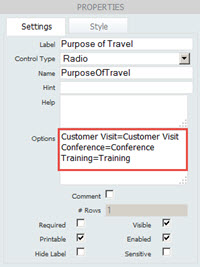
Description of this image
Description of this image Other Details Placeholder:
Provide additional details about
                                            your travel
Leave the other fields as is.Leave as is. 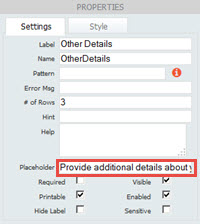
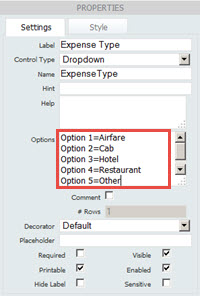
Description of this image Expense Type Options:
Option 1=Airfare
Option 2=Cab
Option 3=Hotel
EnterOption 4=Restaurant
EnterOption 5=Other
Leave the other fields as is.Leave as is.
Description of this image Expense Section Min #: 2
Max #:5
The updated form shows two Expense sections and provides a plus sign (+) so that users can add three more sections to enter their expenses.
Leave the other fields as is.Leave as is. 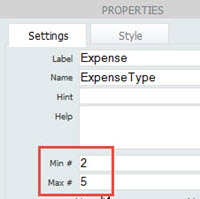
Description of this image
Adding Web Form Rules
For a preview of what you'll do, watch "Adding Web Form Rules."
-
On the web form toolbar, click Rules.

Description of this image -
Click Create New Rule.
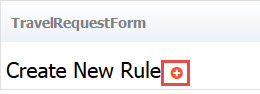
A new rule is created.
Description of this image -
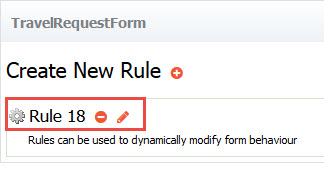
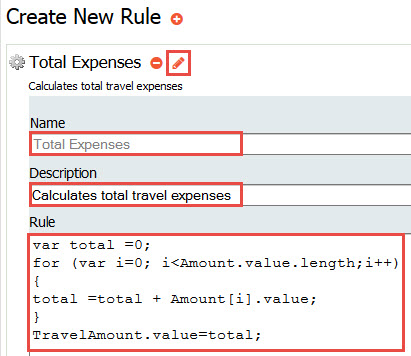
To the right of Rule n, click Edit Rule and enter the following values in the specified fields to create a rule that calculates the total travel expenses:
- Name:
Total Expenses - Description:
Calculates total travel expenses - Rule (Amount and TravelAmount are
control names in TravelRequestForm):
var total =0; for (var i=0; i
total =total + Amount[i].value;
}
TravelAmount.value=total;
Description of this image - Name:
-
Click Create New Rule.
-
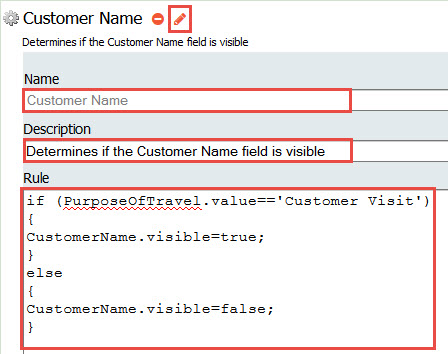
To the right of Rule n, click Edit Rule and enter the following values in the specified fields to create a rule that determines if the Customer Name field in the TravelRequestForm is visible.
- Name:
Customer Name - Description:
Determines if the Customer Name field is visible - Rule:
if (PurposeOfTravel.value=='Customer Visit')
{
CustomerName.visible=true;
}
else
{
CustomerName.visible=false;
}
Description of this image - Name:
-
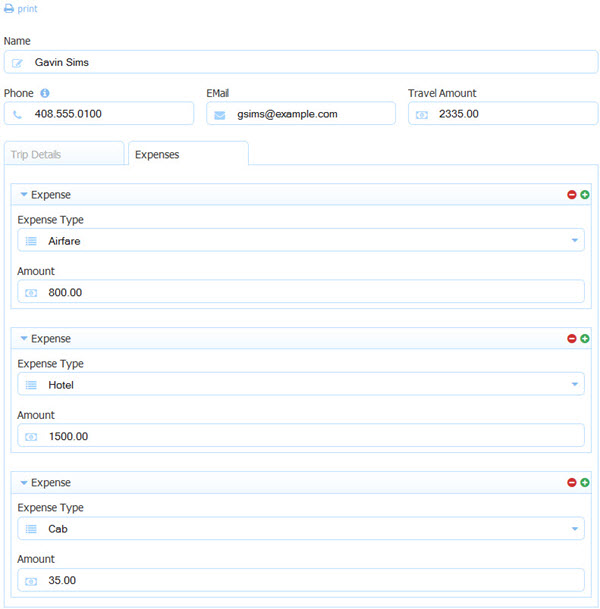
On the web form toolbar, click Preview.

Description of this image Your web form opens in a test window.
-
Enter appropriate values in each field, verify the entries, and close the web form test window.

Description of this image The Travel Amount field is automatically calculated, and the Customer Name field is displayed according to the web form rules.
Description of this image -
Click edit form to return to the Web Form Designer.

Description of this image -
On the application toolbar, click Save to save the web form and business process, and then click the X to close the TravelRequestForm tab and return to the Travel Request Process.

Description of this image
Editing Human Task Properties
-
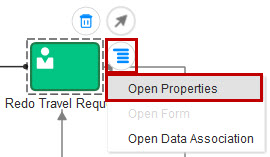
In the Travel Request Process, click Redo Travel Request, click Menu, and select Open Properties.
Description of this image -
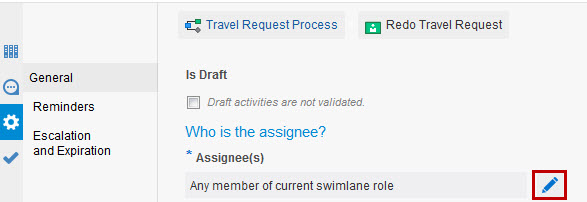
In the General Properties pane, next to Assignee(s), click Edit.
Description of this image -
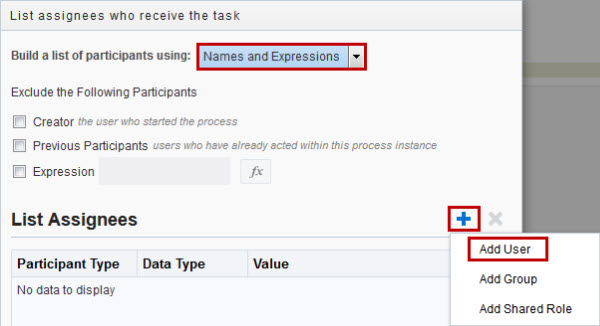
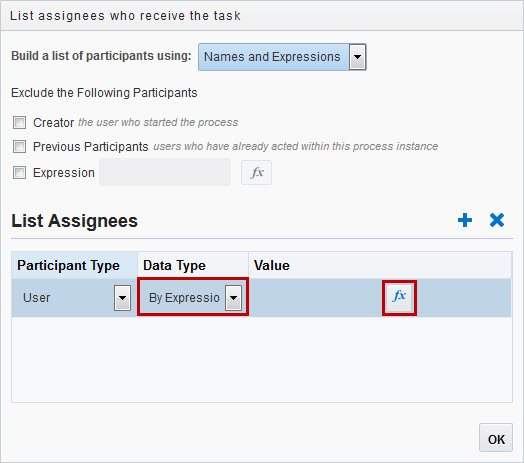
In the List assignees who receive the task dialog box, select Names and Expressions for "Build a list of participants using," click Add, and select Add User.
Description of this image -
Under List Assignees, select By Expression for the data type, and click Expression Editor.
Description of this image -
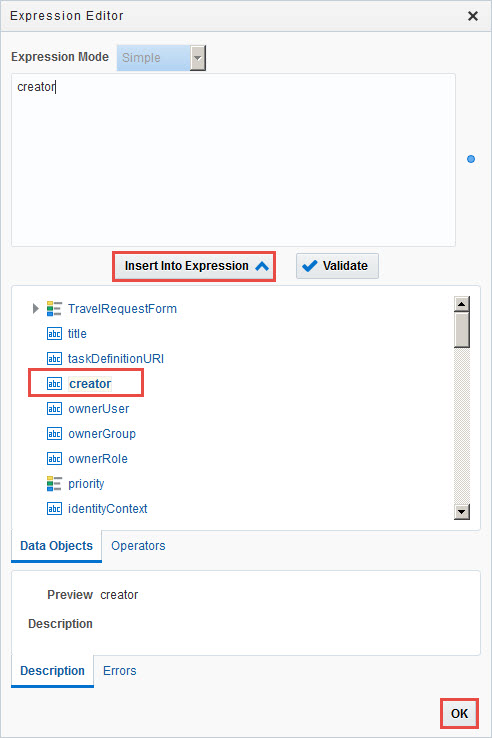
On the Data Objects tab, select creator, click Insert Into Expression, and click OK twice.
Description of this image -
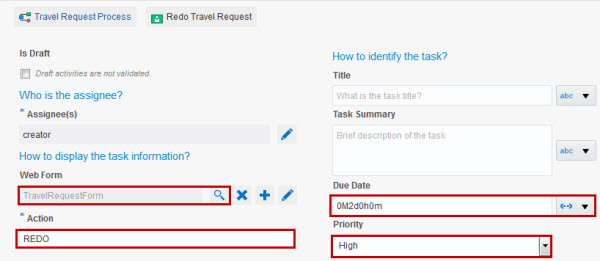
In the General Properties pane, enter or select the following values.
- Web Form: TravelRequestForm
- Action:
REDO - Due Date:
0M2d0h0m - Priority: High
Description of this image -
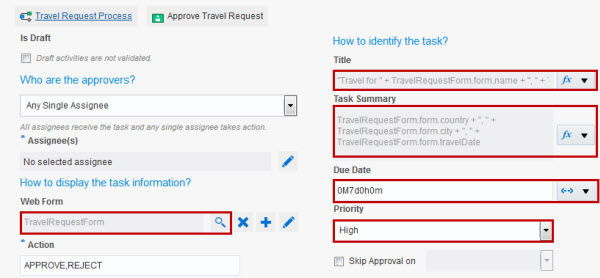
In the Travel Request Process, click Approve Travel Request. In the General Properties pane, enter or select the following values.
- Web Form: TravelRequestForm
- Title: Select Expression
Editor, enter
"Travel
                                        for " + TravelRequestForm.form.name + ",
                                        " + TravelRequestForm.form.customerName
                                        + ", $" +
                                        TravelRequestForm.form.travelAmount
for Expression, and click OK. - Task Summary: Select Expression
Editor, enter
TravelRequestForm.form.country
                                        + ", " + TravelRequestForm.form.city +
                                        ", " + TravelRequestForm.form.travelDate
for Expression, and click OK. - Due Date:
0M7d0h0m - Priority: High
Description of this image -
In the Travel Request Process, click Fulfill Travel Request. In the General Properties pane, select Is Draft.
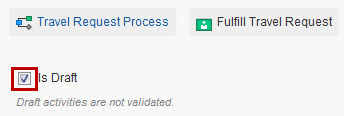
Description of this image -
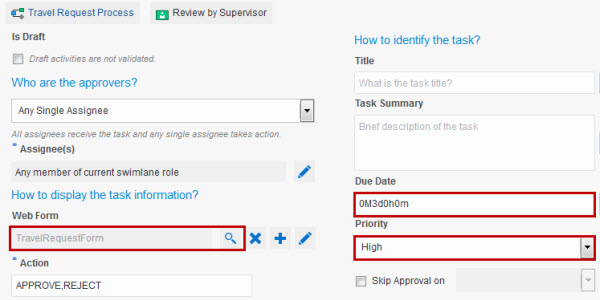
In the Travel Request Process, click Review by Supervisor. In the General Properties pane, enter or select the following values.
- Web Form: TravelRequestForm
- Due Date:
0M3d0h0m - Priority: High
Description of this image
Creating and Associating Data
Data associations define the information passed between flow elements. Oracle Composer automatically creates data associations when you add human tasks and start events to a business process; therefore, you don't need to create them for this application. If you add other flow elements, you may need to create a data association. To create a data association, see Configuring Data Association in Using Oracle Process Cloud Service.
Adding Conditional Statements to Sequence Flows
-
In the Travel Request Process, click the sequence flow between Amount > 5000 and Review by Supervisor, and click Edit.
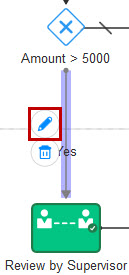
Description of this image -
In the Implementation pane, click Edit to open the Expression Editor.
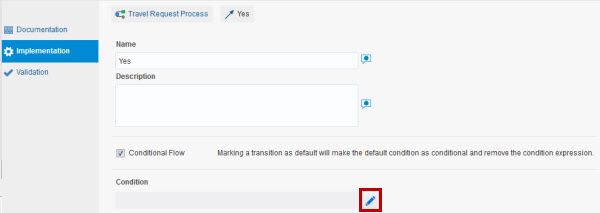
Description of this image -
Enter
travelRequestFormDataObject.form.travelAmount>
                                      5000
for the expression, and click OK.This condition determines that, if the total amount of a travel request is more than $5000, then a supervisor must review it.
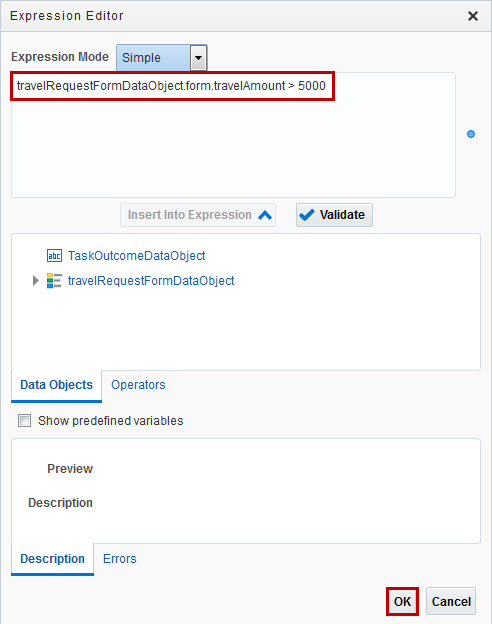
Description of this image -
In the Travel Request Process, click the sequence flow between Supervisor Approved? and Redo Travel Request.
-
In the Implementation pane, click Edit to open the Expression Editor.

Description of this image -
Enter
taskOutcomeDataObject ==
                                      "REJECT"
for the expression, and click OK.This condition determines that, if the supervisor rejects a travel request, then it is sent back to the employee to fix.
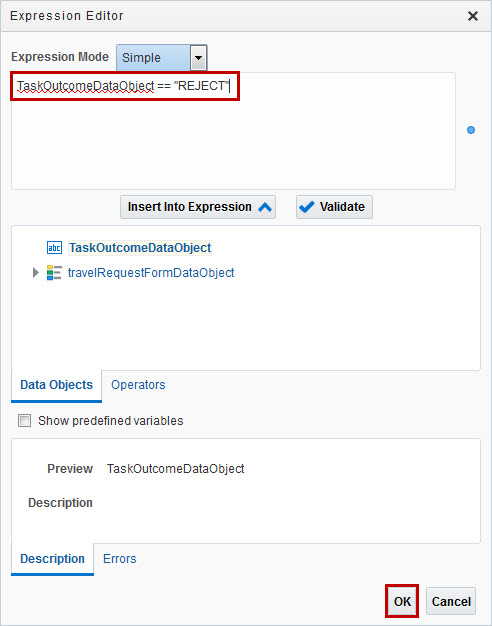
Description of this image -
In the Travel Request Process, click the sequence flow between Approved? and Redo Travel Request.
-
In the Implementation pane, click Edit, enter
TaskOutcomeDataObject== "REJECT"This condition determines that, if the manager rejects a travel request, then it is sent back to the employee to fix.
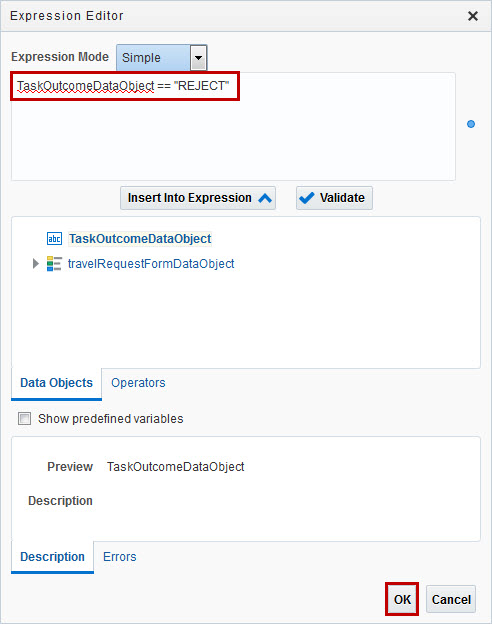
Description of this image -
Click the X to close the Travel Request Process.
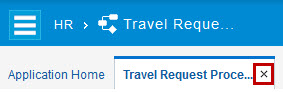
Description of this image
Adding Business Indicators
-
In the Application Component pane, On the Travel Request Application home page, click Indicators. Click New Business Indicator, then click Dimension to create a dimension business indicator.
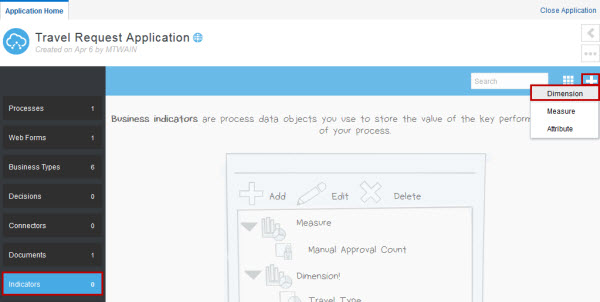
Description of this image -
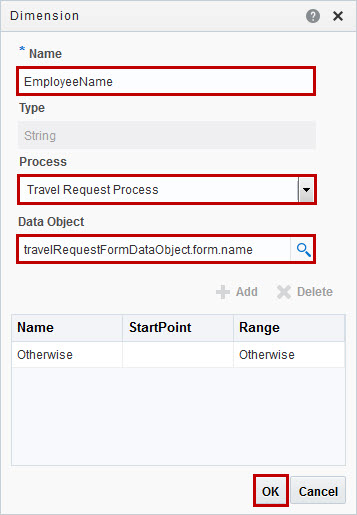
In the Dimension dialog box, enter or select the following values, and then click OK.
- Name:
EmployeeName - Process: Travel Request Process
- Data Object: travelRequestFormDataObject.form.name
Description of this image - Name:
-
On the Indicators page, click New Business Indicator, then click Measure to create a measure business indicator.
-
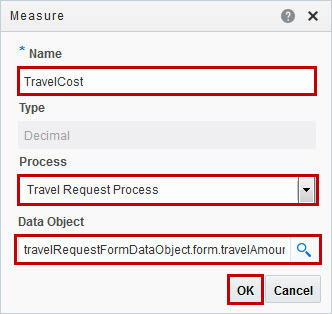
In the Measure dialog box, enter or select the following values, and then click OK.
- Name:
TravelCost - Process: Travel Request Process
- Data Object: travelRequestFormDataObject.form.travelAmount
Description of this image - Name:
-
On the application toolbar, click Save.

Description of this image -
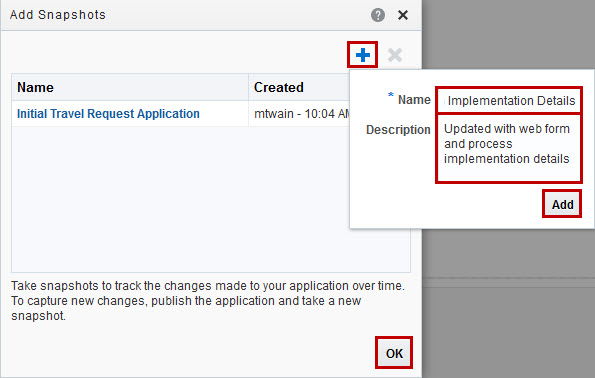
On the application toolbar, click Snapshots to open the Add Snapshots dialog box and make another snapshot of the Travel Request Process for this period in time.

Description of this image -
Click Add, enter the following values, click Add, and then click OK to close the Snapshots dialog box:
- Name:
Travel Request Application with Implementation Details - Description:
Updated with web
                                        form and process implementation details
Description of this image - Name:
Validating the Travel Request Application
In this section, you validate that the Travel Request Application is error-free and ensure the business process functions as expected. The Travel Request Application should be open in Edit mode.
For a preview of what you'll do, watch "Managing the Development Lifecycle."
-
On the application toolbar, click Validate Application.

Description of this image -
In the Validation pane, confirm that the Travel Request Application validated successfully.

Description of this image -
On the application toolbar, click Test Application.

Description of this image -
On the Test Application page, click Deploy.
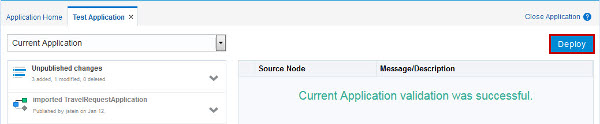
Description of this image -
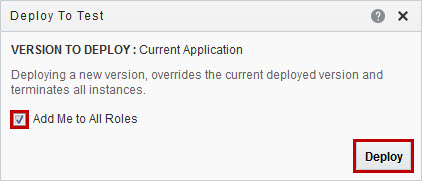
In the Deploy to Test dialog box, ensure the Add Me to All Roles option is selected, and click Deploy.
The Add Me to All Roles option enables you to test the process without having to map users to each role.
Description of this image -
On the Test Application page, click Play.

Description of this image -
In the Application Player, click Travel Request Process to test the behavior of the process.
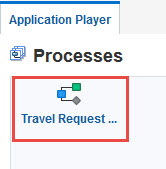
Description of this image -
In the Application Player, on Submit Travel Request, click Play.
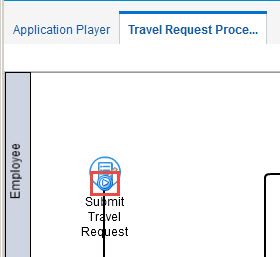
Description of this image -
In the Play dialog box, select a user, and click Play.
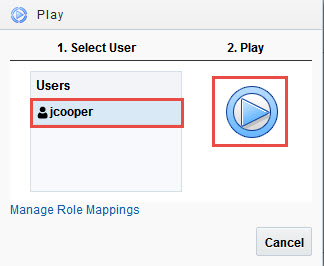
Description of this image -
In the dialog box, enter appropriate values in the fields, and click Submit.
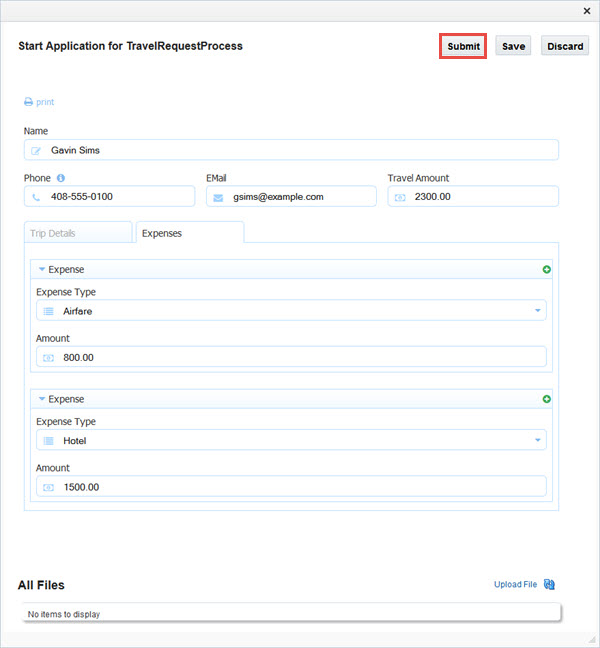
Description of this image The Application Player runs the business process. As it passes through each flow element and sequence flow, it outlines the path it takes through the process. It stops when the process instance reaches a flow element that requires input.
-
Follow the highlighted path in the process, and click Play. Select a user, click Play, and select any values as necessary.
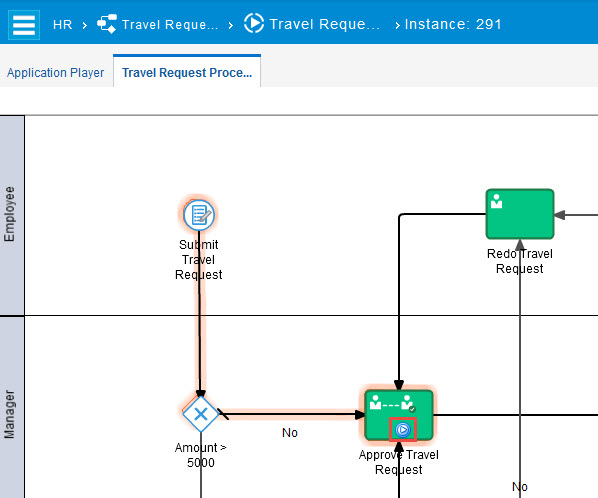
Description of this image -
Repeat step 11 until you complete the process instance, and then click X to close the process instance.

Description of this image -
Click the Travel Request Application breadcrumb to return the to application home page.
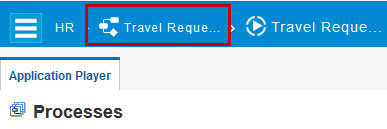
Description of this image -
On the application toolbar, click Publish.

Description of this image -
In the Publish Application dialog box, select Make snapshot, enter
Completed Travel Request
                                    Application
in the snapshot and comment fields, and click Publish.
Description of this image
Testing the Travel Request Application
In this section, you test the Travel Request Application in the Workspace test environment to validate that the application functions as expected.
For a preview of what you'll do, watch "Managing the Development Lifecycle" and "Managing Tasks."
-
On the application toolbar, click Edit, then click Test.

Description of this image -
On the Test Application page, click Try in Workspace to open Workspace in testing mode. Test the application.
You are testing the application version, you deployed in the previous section.
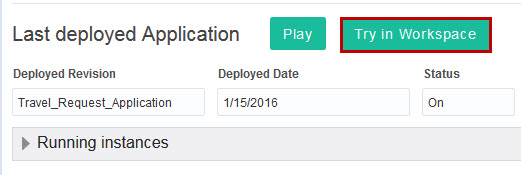
Description of this image Workspace opens in testing mode.

Description of this image
Deploying the Travel Request Application
In this section, as an administrator, you deploy the Travel Request Application to the test environment.
For a preview of what you'll do, watch "Managing the Development Lifecycle."
-
On the global toolbar in Composer, click Management to display the Manage Deployed Applications page.

Description of this image -
Under My Server, click Deploy to display the Deploy Application to My Server wizard.
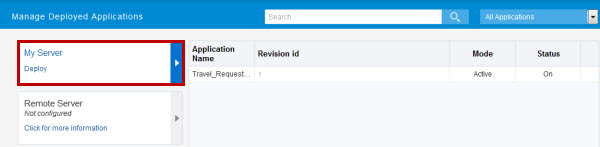
Description of this image -
For the Select Application step, select the following values, and click Customize:
- Select Space: HR [your name]
- Select Application: Travel Request Application
- Select a snapshot: Last Published Version
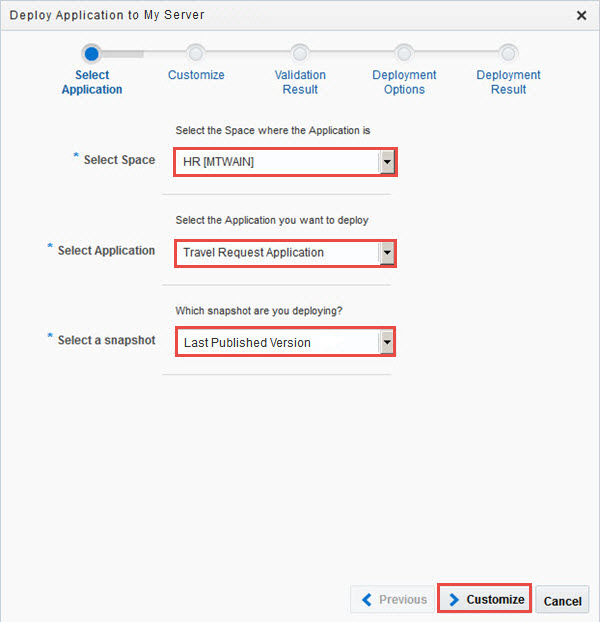
Description of this image -
For the Customize step, leave the fields as is, and click Validate. (There are no web services for this application.)
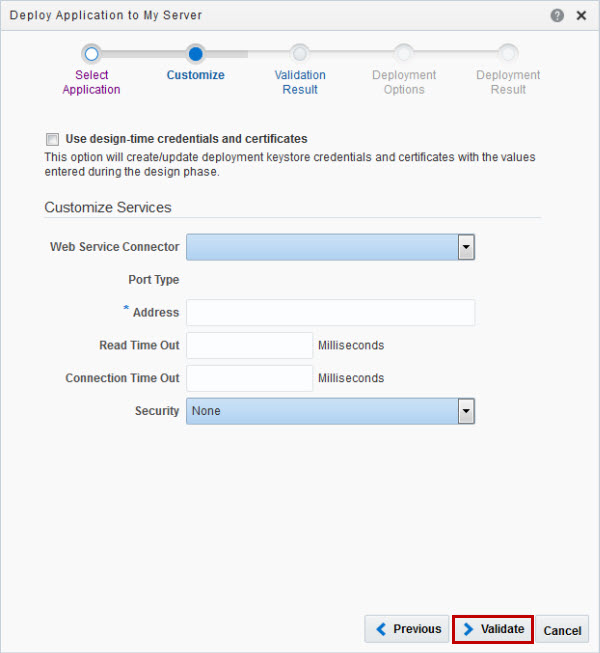
Description of this image -
For the Validation step, ensure that the application validates successfully, and click Options.
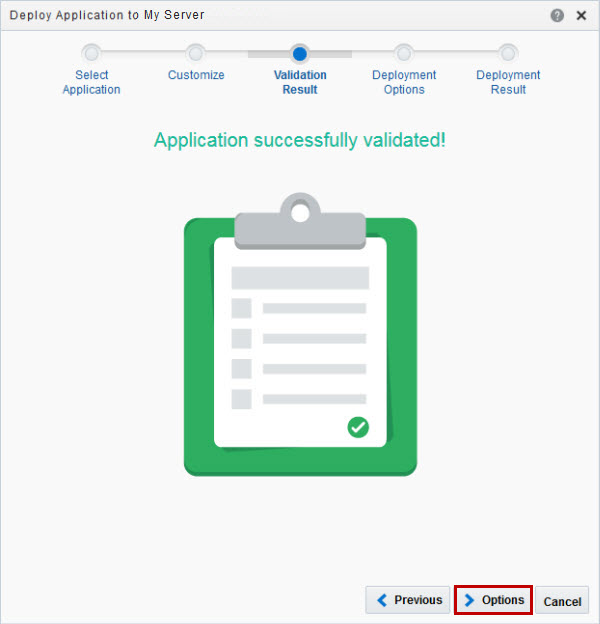
Description of this image -
For the Deployment Options step, enter
1.1for the revision id, select Force default, and click Deploy.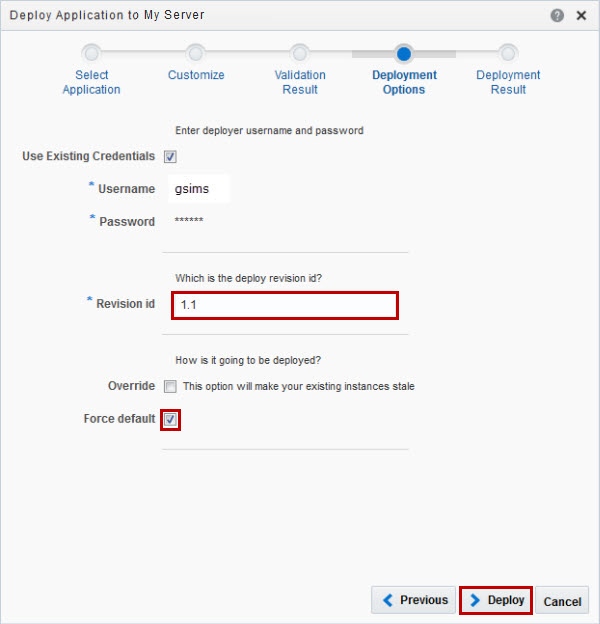
Description of this image -
Ensure that the application deployed successfully, and click Finish.
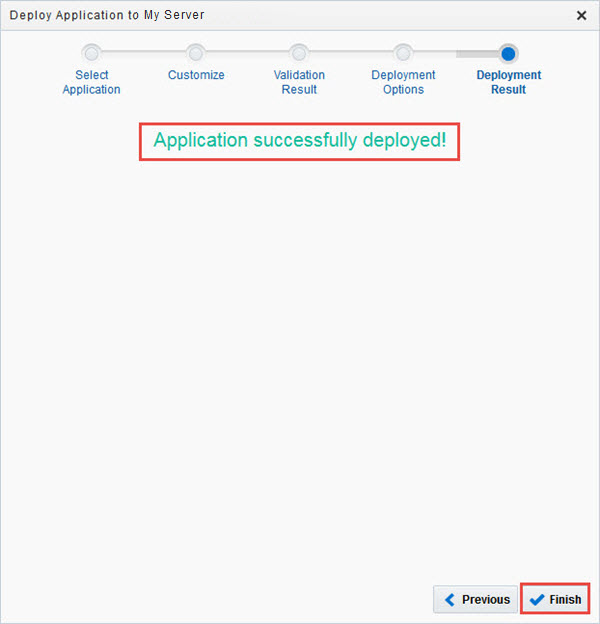
Description of this image
Want to Learn More?
- Using Oracle Process Cloud Service in the Oracle Help Center.